Every spring I tell myself I’ll remember what I did last year. And every spring, without fail, I pull out the same battered notebook I’ve been carrying to my apiary since 2012. Spring inspection is not the time to wing it. Too many things can go wrong after winter, and a missed queen problem or a heavy varroa load in April will haunt you all the way through honey harvest. This is the checklist I walk through on every single hive, starting the first day temperatures consistently hit 55°F.
Timing matters more than most beginners realize. Open a hive too early in cold weather and you’ll chill brood, stress the cluster, and accomplish nothing useful. I wait until midday, when the sun is full and bees are flying actively. A light smoker is enough — I use pine needles and a little dried sumac, which burns cool and smells pleasant. Too much smoke and you’ll mask the signals you’re trying to read.
Step 1: Outside Assessment Before You Open Anything
Spend two minutes watching the entrance before touching the hive. In my apiary, a strong colony in May has dozens of bees fanning at the entrance and returning with pollen on their legs. No pollen means no brood — the colony isn’t rearing young or has lost its queen. Dead bees piled at the entrance after a mild winter can signal starvation or nosema. Spotting these clues before you open saves time and tells you what to look for inside.
- Are bees flying and returning with pollen?
- Any dead bees clustered at the entrance (possible starvation or disease)?
- Unusual odor — foul smell from the entrance can indicate American foulbrood
- Mouse guard intact if you ran one over winter?
- Bottom board debris visible? High varroa debris is an early warning sign
Step 2: Check Stores Before Checking Brood
The number one killer of overwintered colonies isn’t cold — it’s starvation in late winter or early spring, when stores run out just before the first bloom. Check the outer frames on each side for capped honey. A strong colony needs at least two full frames of honey in early spring. If you see bare, polished cells with no stores, feed immediately with 1:1 sugar syrup. Don’t wait to finish the inspection.
I carry a bucket of 1:1 syrup and a hive-top feeder on the truck for exactly this reason. Hungry bees need food now, not after you’ve finished checking all twelve hives.
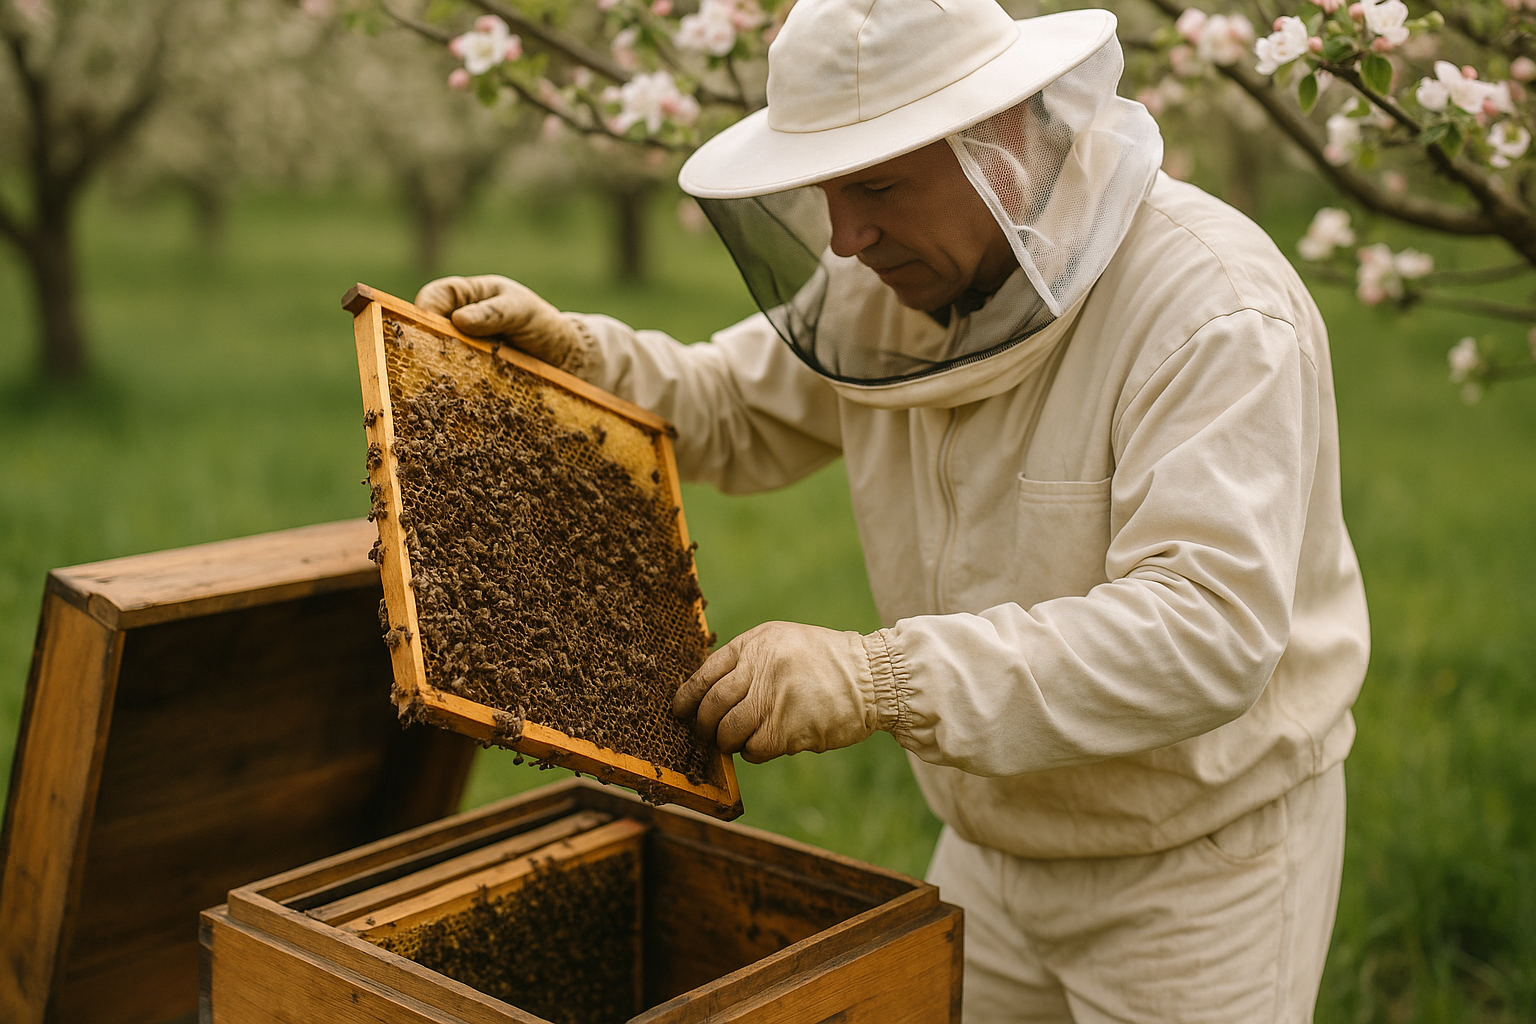
Step 3: Find the Queen or Confirm Her Presence
You don’t always need to find the queen herself — you need to confirm she’s laying. Look for eggs standing upright in cells (they look like tiny white grains of rice). If you see eggs, your queen was alive and laying within the last three days. That’s usually enough confirmation to keep moving.
- Eggs present? (Fresh layer, queen active recently)
- Young larvae in a tight pattern? (Healthy brood)
- Capped worker brood — even, slightly domed surface?
- Any sunken, discolored, or perforated caps? (Signs of disease)
- Queen cells? (Emergency, supersedure, or swarm prep — note location)
If you find no eggs and no open brood, you have a queenless hive or a queen who has stopped laying. This is not a panic situation — it requires a follow-up inspection in five to seven days before you take action. Mark the hive clearly so you don’t forget.
Step 4: Assess Colony Population
A colony that went into winter on eight frames of bees and comes out covering only two frames has shrunk dramatically. Some winter loss is normal, but a weak spring colony needs intervention: you may need to combine it with another weak hive or wait to see if it builds up on its own. I use a simple count — how many frames are covered with bees, wall to wall? Fewer than four frames of coverage in late April is a weak colony worth watching.
Step 5: Varroa Mite Check
Spring is one of two times per year I do a mandatory mite wash. After the winter break in brood, mites are phoretic (riding on adult bees), which means alcohol wash results are at their most accurate. My threshold is 2 mites per 100 bees. Anything above that in spring triggers treatment before the main nectar flow. I use oxalic acid vapor in March when there’s still no brood, then recheck in late April.
- Collect approximately 300 bees in a jar of isopropyl alcohol
- Shake vigorously for 60 seconds
- Pour through mesh, count mites vs. bees
- Calculate: (mites ÷ bees) × 100 = infestation rate
Common Mistakes During Spring Inspection
- Opening too early: Below 55°F, you risk chilling brood. Wait for a warm, sunny midday.
- Ignoring stores: Starvation happens fast in April. Check honey frames first.
- Panicking about queen cells: One or two supersedure cells doesn’t always mean they’re swarming. Read the whole frame first.
- Skipping the mite wash: “They look fine” is not a varroa assessment. Wash counts are the only reliable data.
- Rushing through weak hives: A small colony needs the most careful attention, not the least.
After your inspection, write everything down while it’s fresh — population estimate, queen status, mite count, stores level, any issues noted. A hive record you can compare year over year is worth more than any trick or tip you’ll ever read. The bees will tell you what’s happening if you learn to look for the signs. Get out there before the dandelions finish blooming, and give your hives the attention they’ve earned after surviving the cold.