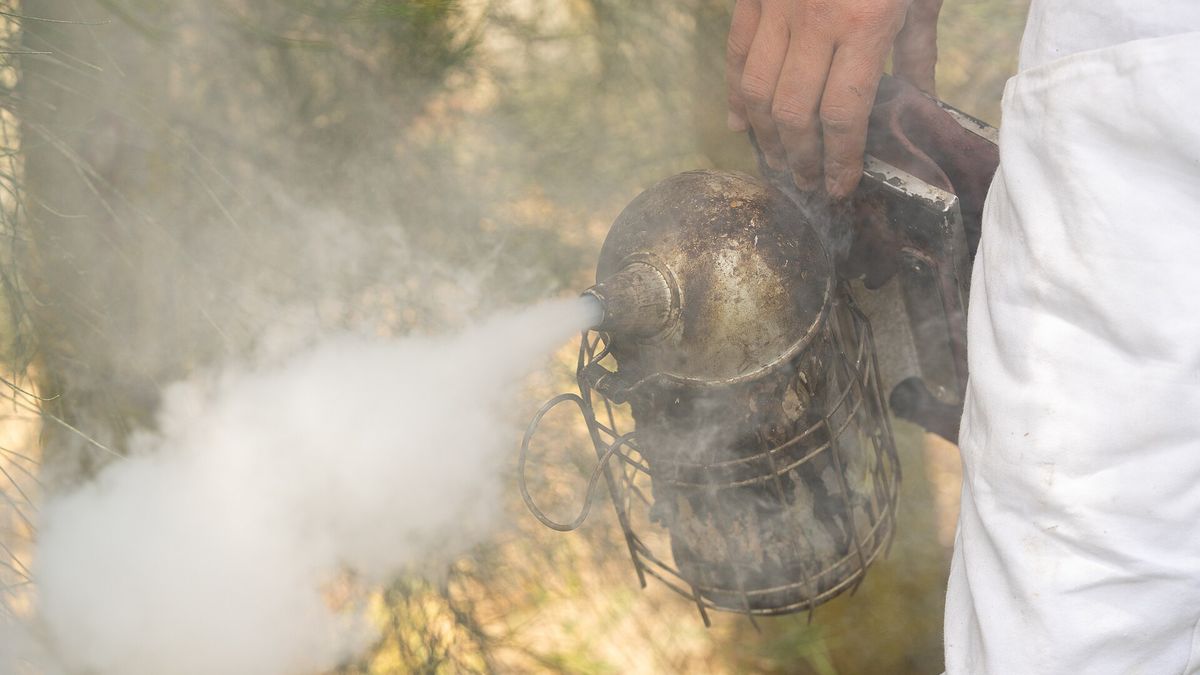
Almost every new beekeeper has the same story: you suit up, walk to the hive, crack the lid, and the smoker goes out. By the time you get it puffing again, the bees are already on alert and the inspection you planned for ten calm minutes turns into a tense half hour. Lighting a smoker sounds trivial, but keeping it burning cool and steady is a real skill, and it makes a big difference in how your first seasons go.
This guide walks you through how a smoker works, which fuels are easy to find, a step-by-step method for lighting it so it stays lit, how to use smoke at the hive without overdoing it, and the most common mistakes beginners make.
Why smoke helps during an inspection
Smoke does not knock bees out, and it is not meant to. It works in two simple ways:
- It masks the alarm signal. When a guard bee feels threatened, it releases an alarm pheromone that tells other bees to defend the hive. A few puffs of cool smoke cover that scent, so the alarm does not spread as quickly.
- It changes what the bees are busy with. Many bees respond to smoke by moving deeper into the hive and filling up on honey. Busy, well-fed bees tend to be calmer while you work.
The key words are “cool” and “few.” Hot smoke, or a cloud of it, irritates bees and can singe them. The goal is a gentle, steady white smoke that you can use in small amounts whenever the colony starts to get loud.
How a smoker works
A standard bee smoker has three parts:
- The fire chamber: a metal can, usually with a grate at the bottom where air comes in.
- The bellows: a small leather or synthetic air bag on hinged boards. Squeezing it pushes air through the bottom of the chamber.
- The lid and nozzle: a hinged cap with a spout that directs the smoke.
The principle is the same as any fire: you need fuel, heat and air. What makes a smoker different is that you want the fuel to smolder, not to flame. A good smoker load is like a slow ember bed at the bottom covered by a thick layer of fuel that has not caught yet. The ember bed keeps burning, the upper layer cools and filters the smoke, and every squeeze of the bellows produces a cool white puff.
Choosing smoker fuel
You do not need special products to start. Plenty of beekeepers use free or cheap materials. Good options include:
- Pine needles: light easily and pack well. Collect them dry.
- Untreated burlap: burns slowly and steadily. Make sure it has never been treated with chemicals or used to store anything treated.
- Dry grass, straw or hay: easy to light but burns fast, so it works best mixed with something denser.
- Wood shavings or untreated sawdust pellets: burn long once they catch.
- Plain cardboard and egg cartons: handy as a starter. Avoid glossy, printed or plastic-coated cardboard.
- Commercial smoker fuel: cotton or wood-based products sold by beekeeping suppliers. Convenient if you cannot gather your own.
Things to avoid: anything treated, painted or coated, synthetic fabric, plastic, and liquid fuels or fire starters with strong chemical smells. Whatever you burn ends up as smoke inside your hive, so keep it simple and natural.
Store your fuel in a dry, covered container next to your gear. Damp fuel is the most common reason a smoker refuses to stay lit.
Step by step: lighting a smoker that stays lit
Light the smoker before you open your bee yard gate, not when the hive is already open. Here is a method that works with most fuels:
- Start small. Take a loose handful of easy-to-light material, like a piece of cardboard, dry grass or a twist of paper, and light it with a match or long lighter.
- Drop it into the chamber and pump. Let it fall to the bottom on the grate and give the bellows several gentle squeezes. You want a small, healthy flame.
- Add a first layer of fuel. Once the starter is burning well, add a loose layer of your main fuel (pine needles, burlap, shavings). Keep pumping so the flame catches this layer.
- Build the ember bed. Keep adding fuel in small amounts while pumping, until you have a few centimeters of glowing, burning material at the bottom.
- Pack the top. Fill the rest of the chamber with fuel and press it down firmly but not too tightly, so air can still pass. This top layer is what cools the smoke.
- Close the lid and test. Pump a few times. Thick, cool white smoke means you are ready. If the smoke is thin and blue or you see flames at the nozzle, add more fuel on top.
- Give it a minute. Pump occasionally for a minute or two before walking to the hive. A smoker that survives the first two minutes usually lasts the whole inspection.
Quick check: hold your hand a short distance in front of the nozzle while you pump. If the smoke feels hot, add more packed fuel on top before you use it on bees.
Using smoke at the hive
Good smoking is mostly restraint. A simple routine for an inspection:
- At the entrance: give one or two gentle puffs into the entrance and wait about a minute. This gives the message time to spread inside.
- Under the lid: lift the cover slightly, give one or two puffs under it, close it gently, and wait a moment before opening fully.
- During the inspection: puff lightly across the top bars only when bees start lining up between frames and looking at you, or when the hum gets louder. Aim the smoke over the bees, not straight into the cells.
- Keep it nearby: set the smoker on its side, on the ground or on a hive stand, upwind of the hive. Standing it upright lets the fire burn up through the fuel faster.
- Pump it now and then: a squeeze every few minutes keeps the embers alive even when you are not using it.
If a colony stays defensive despite light smoke, close the hive and try another day. More smoke rarely fixes a grumpy colony and can make things worse.
Common smoker mistakes and how to fix them
- Lighting it at the last second. A smoker needs a few minutes to settle. Light it first, then put on your gloves and gather your tools.
- Packing too much fuel too early. If you stuff the chamber before there is an ember bed, the fire suffocates. Build the base first, then fill.
- Not packing enough. A half-empty chamber gives hot, short-lived smoke. Keep it full.
- Using damp fuel. Wet material smolders weakly and goes out. Keep fuel dry and covered.
- Smoking too much. Clouds of smoke irritate bees and can taint honey you plan to harvest. A few puffs at the right time beat a constant stream.
- Pointing hot smoke at the bees. If you see sparks or feel heat, step back and add fuel to the top.
Safety and putting it out
A smoker is a small fire, and it gets very hot. Treat it with respect:
- Always check local rules and current fire warnings before lighting any open flame outdoors, especially during dry weather.
- Keep the smoker away from dry grass, leaves and your car.
- Never put a hot smoker inside a vehicle, a plastic tote or a closed shed.
- To put it out, plug the nozzle with a cork or a twist of grass, or empty the contents into a metal bucket and cover them, or soak them with water on bare ground. Let the smoker cool completely before storing it.
- Clean out the creosote buildup inside the lid from time to time with a scraper, so the lid closes properly.
Summary
- Smoke calms bees by masking the alarm pheromone and keeping them busy; use cool smoke in small amounts.
- Use dry, untreated fuels such as pine needles, burlap, straw or shavings, and avoid anything treated or synthetic.
- Light a small starter, build an ember bed while pumping, then pack the top layer to cool the smoke.
- Light the smoker before you open the hive, puff at the entrance and under the lid, and wait before you start.
- Set it on its side between uses, pump it occasionally, and put it out safely in a metal container or with water.
Once you get the hang of it, lighting the smoker becomes a calm little ritual that sets the pace for the whole inspection, and your bees will thank you for it.
Photo: Un apiculteur prépare son enfumoir, by Skander zarrad, license CC BY-SA 4.0, via Wikimedia Commons. Cropped.